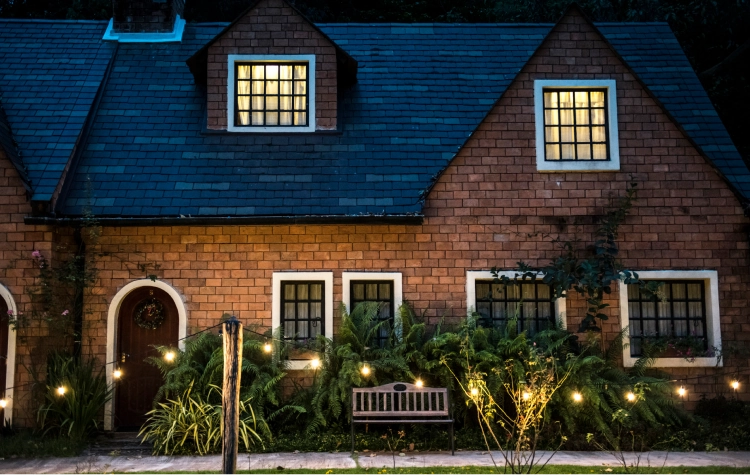
Want to make your home look amazing at night while also keeping it safe and secure? That’s exactly what landscape lighting can do. Whether you’re in Mississauga, Vaughan, Scarborough, or anywhere else in the GTA, outdoor lighting instantly boosts your curb appeal and yes, you can install it yourself.
Here’s a simple, step-by-step guide (with expert tips from us at BD Lights) to help you plan and install landscape lighting around your home.
Step 1: Know Why You’re Installing Landscape Lighting
Before getting your hands dirty, start by thinking about your purpose.

Are you trying to:
- Highlight a beautiful tree or flower bed?
- Make your pathway safer at night?
- Light up your patio for evening dinners?
- Create a warm welcome near the front door?
Your “why” determines your lighting style, placement, and power choices. When we design lighting for our clients, we always start with this step.
At BD Lights, we start every lighting project with this exact question. Knowing your “why” makes the rest easy.
Step 2: Divide Your Outdoor Area into Zones
Don’t try to light your entire yard all at once. The smarter approach is to divide the area into zones. Walk around your home at night with a flashlight, you’ll instantly notice the dark spots and areas that need attention.

Common zones to consider:
- Front entrance and pathway
- Driveway or garage area
- Garden beds and trees
- Back patio or deck
- Side yards or corners
Create a quick sketch on paper. Mark where you want lights and what kind (spotlight, path light, etc.). This visual will guide your shopping and installation.
We often sketch a simple layout with clients to plan better. At BD Lights, we’ll even help you design one for free during a consultation.
Step 3: Choose the Right Lights
Outdoor lighting isn’t one-size-fits-all. Different types of lights serve different purposes.
Types of landscape lights:
- Path lights – for walkways, flower beds, and driveways
- Spotlights – to highlight trees, sculptures, or house features
- Flood lights – cover wider spaces like large walls or lawns
- Deck/stair lights – add safety and ambiance to steps or railings
Also decide whether you want solar or low-voltage lighting.
Should You Go Solar or Hardwired?
- Solar lights are easy to install, but they’re unreliable in Canadian winters. Short days and snow can reduce their effectiveness.
- Low-voltage lighting connects to a transformer and offers consistent brightness, better quality, and long-term durability – especially in GTA’s weather.
We highly recommend low-voltage lighting for year-round performance.
At BD Lights, we also supply fixtures designed for Canadian winters.
Step 4: Get the Right Equipment
Here’s what you’ll need if you’re going the low-voltage route:
- Transformer – Converts household 120V power to safe 12V
- Outdoor cable (low-voltage) – Rated for underground use
- Weatherproof fixtures – IP65 or higher to handle rain and snow
- LED bulbs – Choose warm white (2700K–3000K) for that cozy outdoor feel
- Waterproof connectors – To join wires safely
Pro Tip: Buy a transformer that can handle at least 20% more power than your current needs. This gives you room to expand later.
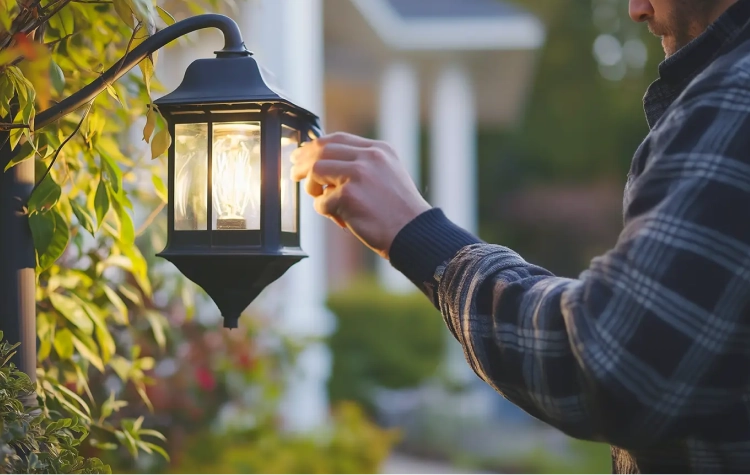
Step 5: Time to Install the Lights

Don’t worry, you don’t need to be an electrician to do this. Here’s a basic process we follow for most home installations:
- Mount the transformer near an outdoor GFCI outlet.
- Lay out your lights based on your earlier sketch, don’t bury anything yet.
- Run the cable along the path between lights and back to the transformer.
- Connect each fixture using waterproof connectors.
- Plug in the transformer and test your lights at night to see the full effect.
- Adjust beam angles and reposition lights if needed.
- Once you’re happy, bury the cable about 2–3 inches underground or under mulch.
Keep things flexible in case you want to shift a light or two later.
Step 6: Avoid These Common Mistakes
Even experienced homeowners run into a few pitfalls. Watch out for:
Wrong color temperature – Stick with warm white (2700K–3000K) for a homey look. Cool white feels too harsh.
Over-lighting – Too many lights can ruin the mood. Less is more.
Straight-line placement – Staggering lights looks more natural and elegant.
Poor glare control – Lights shining into eyes are uncomfortable. Angle carefully.
Voltage drop – For larger systems, power fades at the farthest points. Break the layout into zones or use a multi-tap transformer.
Step 7: Maintain It Over Time
Landscape lighting is low maintenance, but not zero maintenance. Check things every season:
- Clear dirt or mulch off lights
- Make sure no wires are exposed
- Tighten any loose fixtures or screws
- Replace bulbs that are dimming
- Look for water or insect buildup inside lenses
Want to make your life easier? Add a smart timer or Wi-Fi control to automate on/off schedules.
DIY vs. Hiring a Pro – What’s Right for You?
You can absolutely do a small system yourself – especially if you’re just adding 4–6 lights along a pathway or garden bed.
But for larger yards, or if your property has slopes, hardscaping, or existing irrigation lines, you might be better off calling in a pro.
At BD Lights, we help homeowners across the Greater Toronto Area with:
- Design consultation
- High-quality product selection
- Full installation and wiring
- Smart automation setups
- Seasonal adjustments and repairs
Even if you’re a DIYer, we’re happy to guide you or supply the right products.
Book a free consultation today or call us at (647) 893-6582 . Let’s light up your GTA home together!